RIFLES
(This page contain information specific to the Rifle Section. For information on the base impression CLICK HERE.)
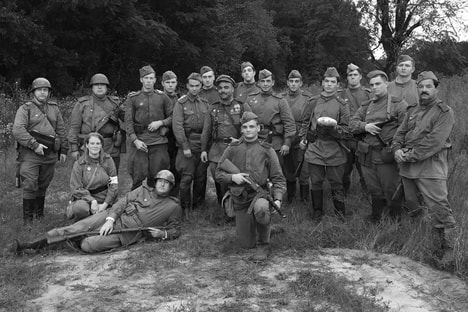
We are the Rifle Section and the main combat element of the Red Guard. Our standard unit impression is the 9th Rifle Battalion, 39th Guards Rifle Regiment, 13th Guards Rifle Division.
The infantry was the backbone of the Red Army during Great Patriotic War. The typical infantrymen were the ones on the ground, doing the hard work for victory over there German invaders. Eighty percent of Soviet males born in 1923 didn’t survive WWII. Most of them died while in service with the Red Army Infantry.
The infantryman wore only the basics, no bells, no whistles. His job was simple - kill the enemy. Whether it be while armed with a Mosin Nagant, PPSh-41, PPS-43 or even a SVT40. His urge to fight and die for his country was like no other, and his determination would lead to victory over the most technologically advanced military of its day.
Below is a series of photos depicting different uniforms and equipment and the various ways they are worn. We hope these will be a useful reference to anyone interested in a Red Army infantry impression.
Guards Kapitan D. Motowylak
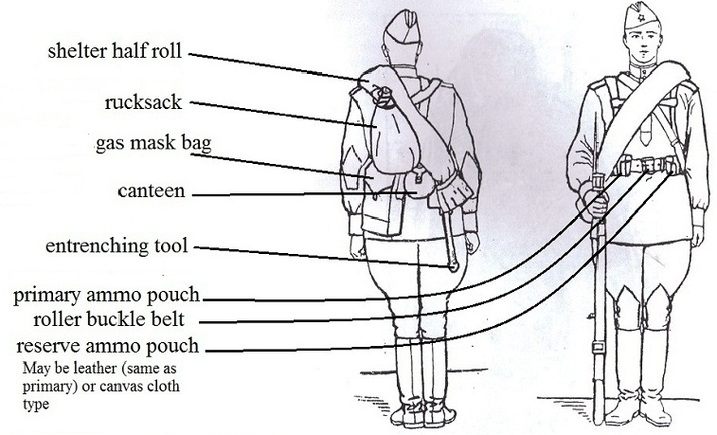
The below diagram is from an early post-war manual, only ONE ammo pouch
should be worn ( on your right hip ) unless an early war event.
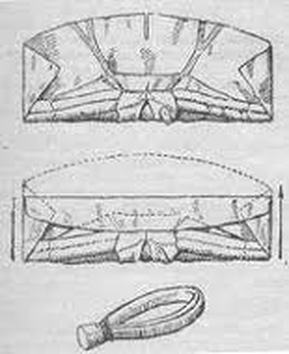
Myeshok Rucksack
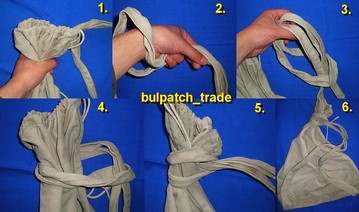
How to tie a myeshok rucksack, very important to know!
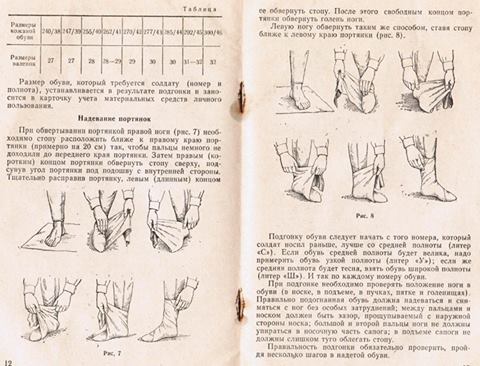
Portyanki Footwraps
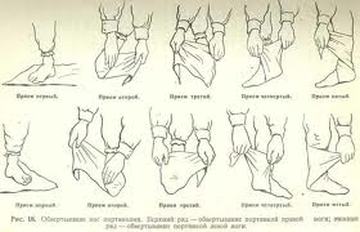
How to wear portyanki, will take some practice so work on it.
Below is how to roll a greatcoat into a "horseshoe" roll to be strapped at the top of the M-36 or M-38/40 Rucksacks.

Shinel Greatcoat Roll
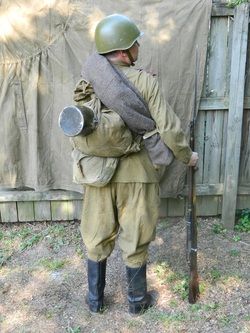
The greatcoat was more commonly rolled into a longer horseshoe roll, when not in use, as seen here and most commonly worn over the wearer's left shoulder thus keeping his right shoulder open to fire his/her weapon from the shoulder.
This type of greatcoat roll was used from the earliest days of the year even into the postwar years.
This may take the most practice to get it tight. Remember, postwar greatcoats are a bit thicker of material so you may not get it as tight as wartime coats but with some practice, you can get close. Some people have taken razors and shaved down the wool a bit to make it thinner and easier to roll.
VARIOUS WAYS FOR WEARING KIT, HELMET ALWAYS TO WORN UNLESS ORDERED OTHERWISE
Scroll down for examples of how to wear uniform and kit based off of original photos and modeled by native Russians, two of which belong to this unit.
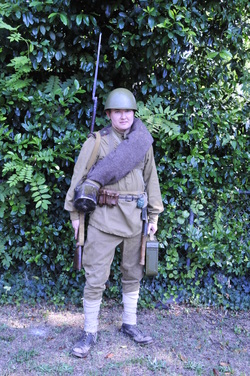
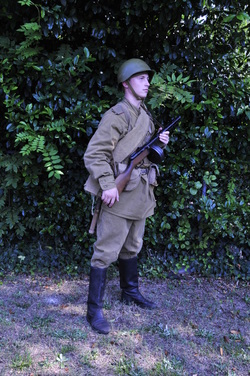
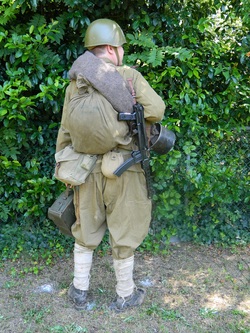
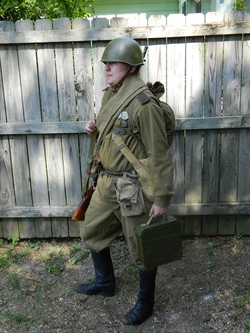
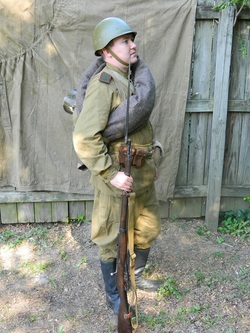
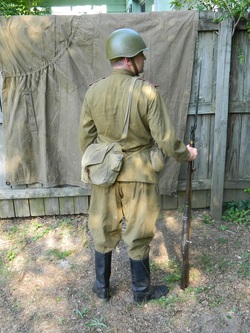
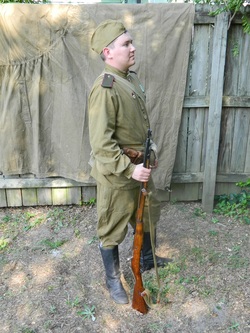
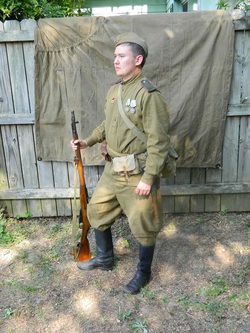
Fall or Spring, mid to late war impression.
Bayonet fixed and 1910 Maxim ammo can at his side.
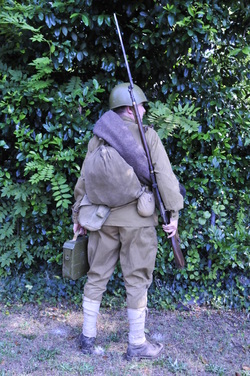
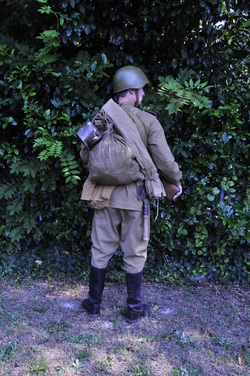
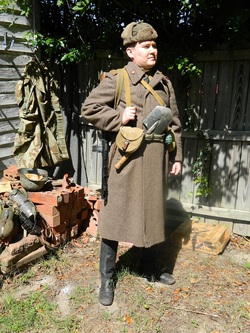
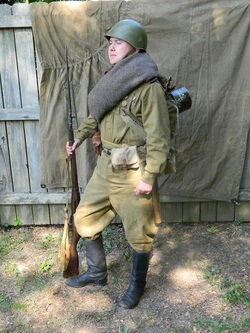
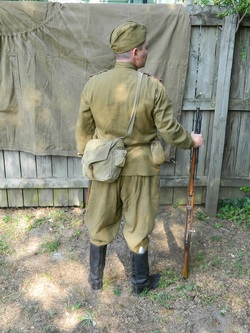
Typical frontovik in the spring with shelter half roll, like the greatcoat, always worn over the left shoulder to keep your firing shoulder open.
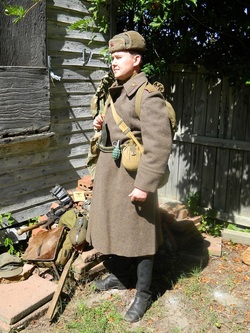
One way to wear your mess kit, from your pack.
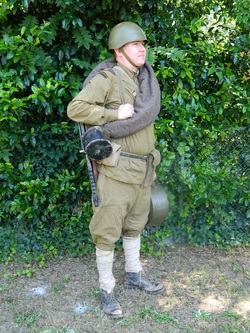
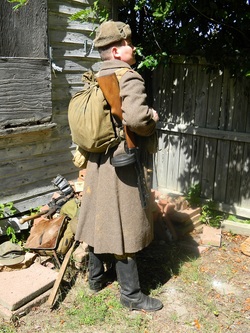
Spring kit with greatcoat bedroll, low boots w/ puttees and PPS-43
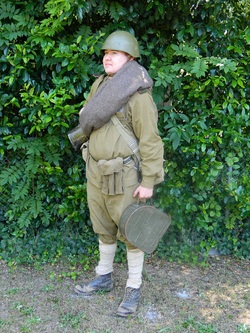
Notice this man is a Number 2 for a DP-28 machine gun crew.
Notice the old style M-24 mess kit slung from bedroll for relative easy access.
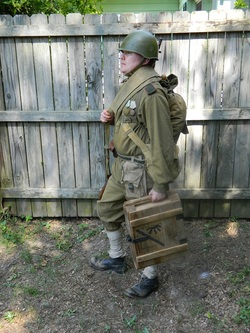
SUMMER

Summer marching order with ammo crate.
Another mid to late war spring or summer impression with RGD-33 grenade pouch and ammo crate at his side.
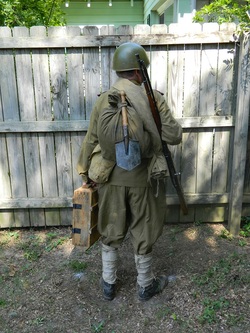
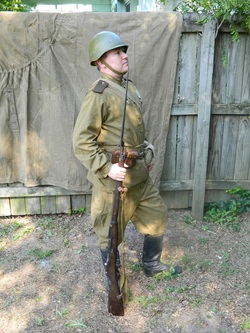
A variation of a way to carry your e tool and your bayonet reversed on the rifle when not in use. Bayonets are always to be carried either fixed or like this.
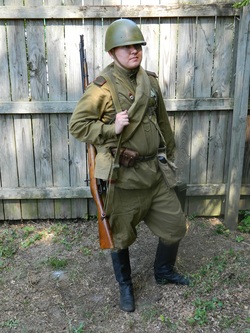
Shelter half roll, Maxim box, high boots.
Summer matching order with high boots, notice this man is a Number 2 on a Maxim machine gun crew.

E tool worn as seen in many period photos, slung from the pack in this fashion. Sometimes it was worn down inside the pack with handle facing out the top of the rucksack.
WINTER
Winter order, notice no helmet and e tool stuck in belt for easy access and close combat!
F-1 grenade stuck on belt.
STAGE 1 FULL MARCHING ORDER FOR WHEN ON THE MARCH OR IN THE FIELD
Includes all basic field gear, belt, grenade pouch, e tool, canteen, rucksack, mess kit, greatcoat bed roll and helmet. Helmet is
ALWAYS to be worn unless ordered otherwise. The shelter half is stashed away in his pack but in the summer months, the shelter half should be worn like the greatcoat roll for easy access.
ALWAYS to be worn unless ordered otherwise. The shelter half is stashed away in his pack but in the summer months, the shelter half should be worn like the greatcoat roll for easy access.
Bayonet in "fixed" position.
Notice this frontovik wears his old style mess kit from his rucksack.
STAGE 2 OF GEAR, SAME AS ABOVE BUT WITH NO PACKS OR BED ROLLS, FOR TRENCH FIGHTING/MISSIONS.

STAGE 3 GEAR FOR GARRISON DUTIES, WORK DUTIES, GUARD DUTIES, FORMATIONS ETC.
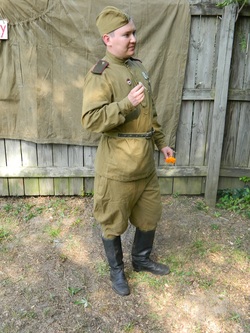
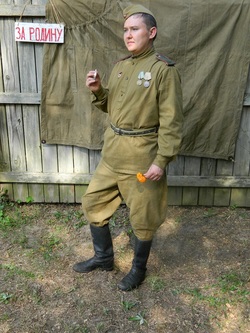
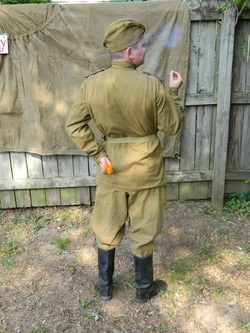
PROPER "WALKING OUT" DRESS FOR DINING OUT, PHOTOGRAPHS, AND OFF DUTY.
HOW TO PROPERLY WEAR THE SHELTER HALF
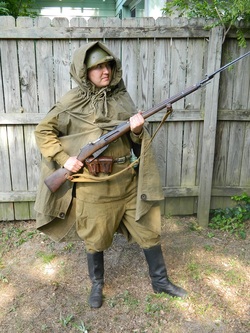
Notice the right arm sticks out of the armhole for easier fighting. The top set of drawstrings is for the hood, the bottom set for tying around the shoulders.
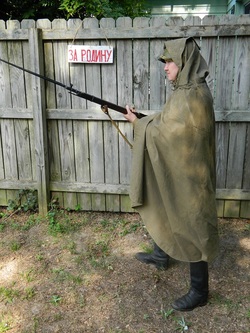
With hood worn.
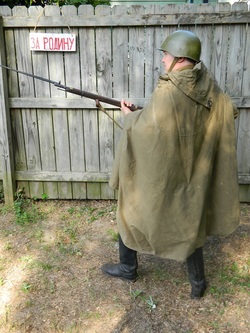
Without hood worn and notice the cape is tied up in the back by a toggle button preventing it from dragging on the ground, the tied up corner goes to the inside of the cape as seen here.
