How to Convert a Post War Overcoat (Shinel) to WWII Specifications
шинель, pronounced "shinel," is the Russian word for the military overcoat. Unlike most WWII overcoats, the shinel closes with hooks and eyes rather than buttons.
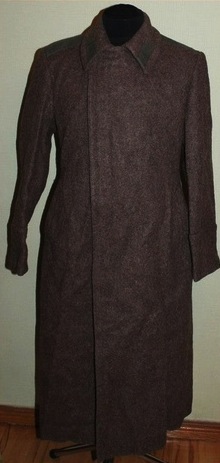
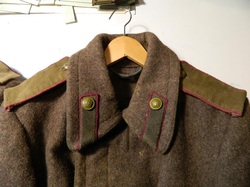
When you receive your surplus overcoat, it will probably look much like the one pictured at left. To get it ready for wear in the field, you will need to do the following:
Step 1- Carefully remove the green collar tabs and shoulder boards. Save them as they might be useful for other projects.
Step 2- Attach M-43 collar tabs to the collar.
Step 3- Attach shoulder loops and buttons for attaching M-43 shoulder boards.
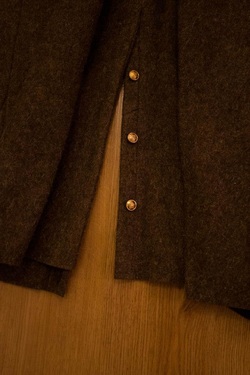
Step 4- Remove the buttons from the vent in the skirt.
Step 5- Replace the two 22 mm gold buttons on the back half belt with WWII period-style buttons.
All five steps are detailed below with pictures.
Note - Some of the more recent imports will come with five gold-colored 22 mm buttons down the front. Generally, these buttons have the Czarist-style insignia rather than the Soviet star with sickle and hammer. Don't worry, these buttons are non-functional and purely decorative. This was more a WW1 feature they brought back on some later greatcoats. You will need to remove those as well.
When you receive your surplus overcoat, it will probably look much like the one pictured at left. To get it ready for wear in the field, you will need to do the following:
Step 1- Carefully remove the green collar tabs and shoulder boards. Save them as they might be useful for other projects.
Step 2- Attach M-43 collar tabs to the collar.
Step 3- Attach shoulder loops and buttons for attaching M-43 shoulder boards.
Step 4- Remove the buttons from the vent in the skirt.
Step 5- Replace the two 22 mm gold buttons on the back half belt with WWII period-style buttons.
All five steps are detailed below with pictures.
Note - Some of the more recent imports will come with five gold-colored 22 mm buttons down the front. Generally, these buttons have the Czarist-style insignia rather than the Soviet star with sickle and hammer. Don't worry, these buttons are non-functional and purely decorative. This was more a WW1 feature they brought back on some later greatcoats. You will need to remove those as well.
Step One:
Carefully remove the green collar tabs and shoulder boards and set them aside. You'll want to save them for other projects.
Carefully remove the green collar tabs and shoulder boards and set them aside. You'll want to save them for other projects.
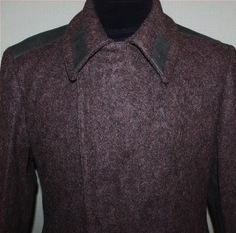
Once those are removed, we'll be adding M-43 tabs and shoulder boards like the ones shown in this picture.
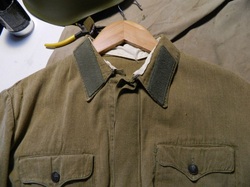
Step Two:
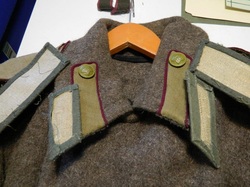
Here we see a set of reproduction collar tabs and shoulder boards made by Dorian Motowylak. Notice the tabs run along the stitching of the collar, the button is at the back, and the longer edge of the tab is on top.
Here we see a set of reproduction collar tabs and shoulder boards made by Dorian Motowylak. Notice the tabs run along the stitching of the collar, the button is at the back, and the longer edge of the tab is on top.
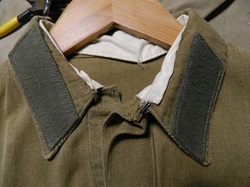
Collar tabs can be applied by hand or by machine. Here we see an original coat the tabs applied by hand.
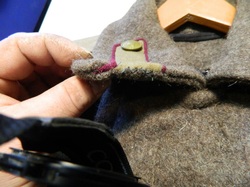
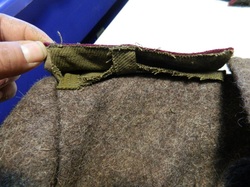
Open the collar seam along the edge and tuck in the collar tab. Be sure to center the tab on the collar as in the picture above.
Close the seam by hand. Fold back the tab and sew it to the collar by hand or by machine.
Close the seam by hand. Fold back the tab and sew it to the collar by hand or by machine.
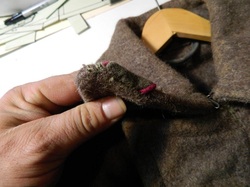
Here's an example of an original tab tucked into and hand sewn into collar seam.
Step Three:
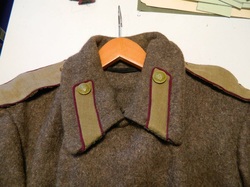
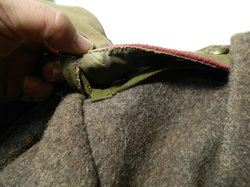
Here we see an original shoulder board with it's attaching loop. Place your loop so that the end of the shoulder board is even with the shoulder seam.
Here we see an original shoulder board with it's attaching loop. Place your loop so that the end of the shoulder board is even with the shoulder seam.
Here we see the same view of a reproduction shoulder board.
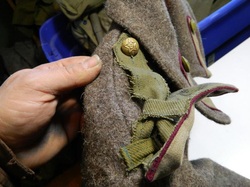
Notice the shoulder board button and loop should be just in front of the shoulder seam! Proper 18mm brass or OD painted steel buttons should typically be used for all shoulder boards on either tunics or greatcoats.
Notice the shoulder board button and loop should be just in front of the shoulder seam! This way the board faces slightly forward and doesn't rest flat.
Step Four:
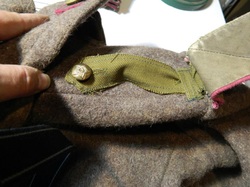
Postwar coats will have these three decorative 14mm Staybright buttons in the vent at the back of the coat. Remove all three and do not replace.
Postwar coats will have these three decorative 14mm Staybright buttons in the vent at the back of the coat. Remove all three and do not replace.
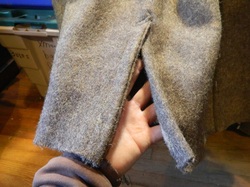
Postwar buttons removed. Leave them removed and replace with nothing.
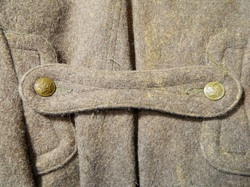
Step Five:
Remove the 22mm postwar "staybright" half belt buttons and replace them with original or early postwar 22mm brass or OD painted steel buttons.
Remove the 22mm postwar "staybright" half belt buttons and replace them with original or early postwar 22mm brass or OD painted steel buttons.
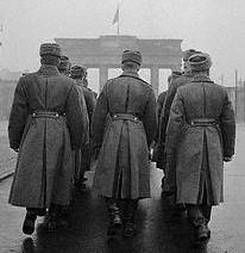
The Finished Product:
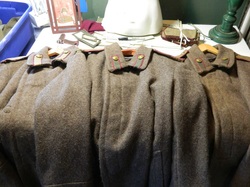
Here we have properly converted postwar greatcoats.
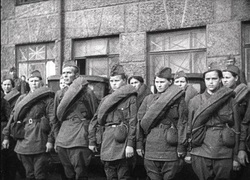
Reference Photos
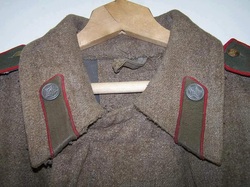
An original greatcoat with tabs and boards. Notice how the tabs run along the stitching of the collar.
Your belt should ALWAYS be worn above the rear half belt of the overcoat on the skinniest part of your waist.
Rolled greatcoats - Directions for rolling overcoats are in the Standard Impression Guidelines section of this site.
Subdued Collar Tabs for the M-35 Tunic: This is why you saved those overcoat tabs!
We allow the postwar greatcoat tabs to be worn on M-35 tunics as the subdued M-41 types.
The tabs on the M-35 tunic should be machine sewn on where possible and never forget that collar liner.
